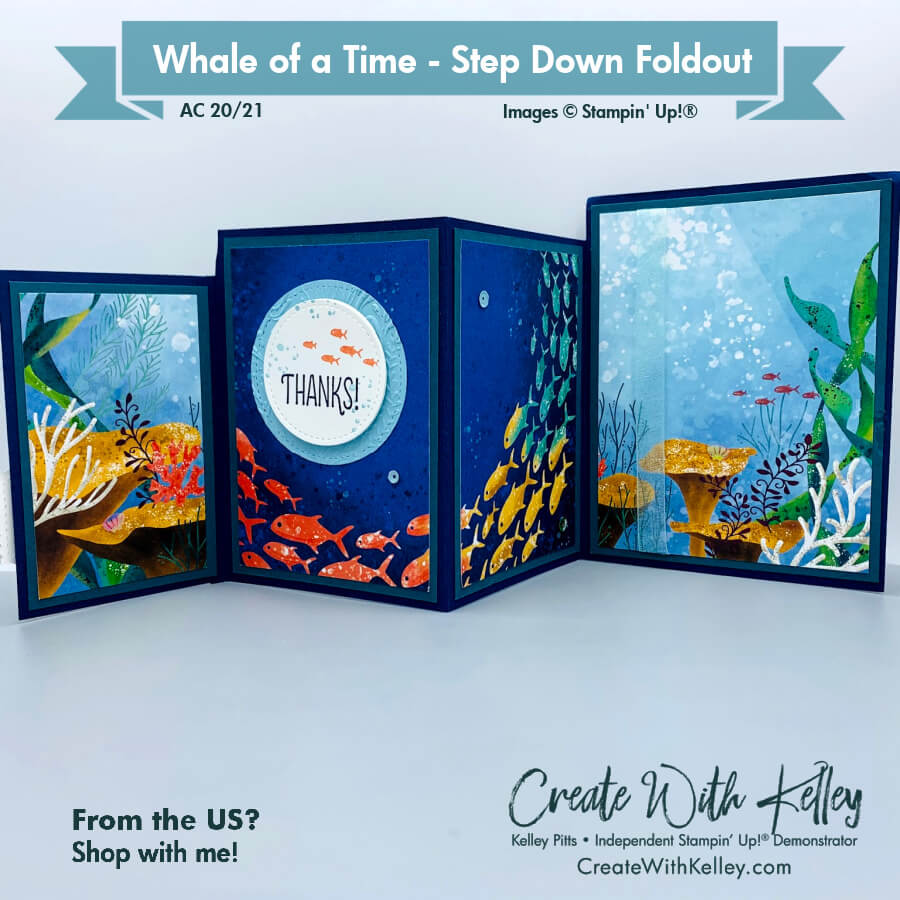
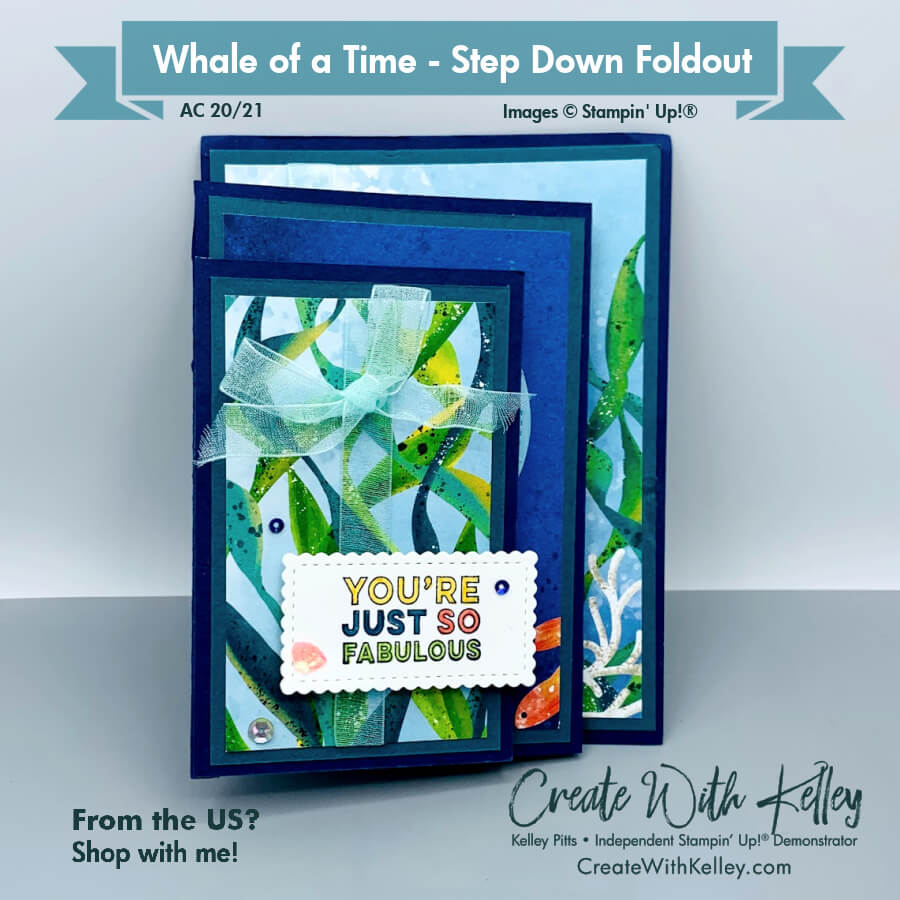
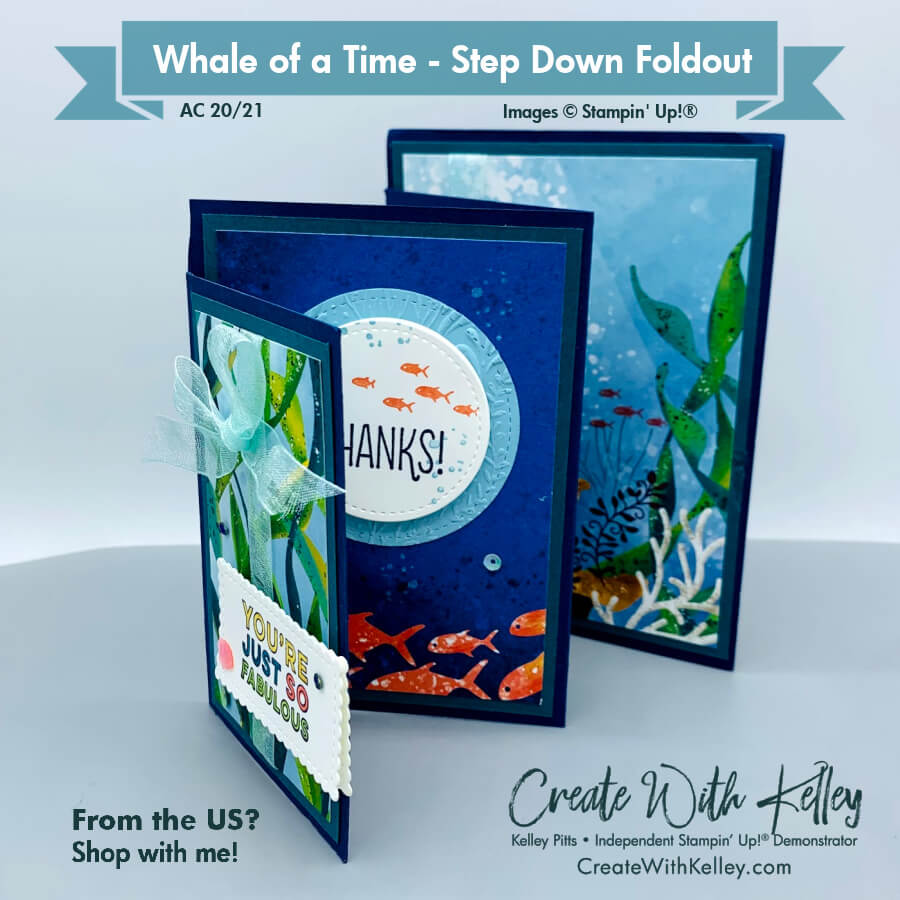
Whale of a Time: Thanks Step-down Fold-out for International Highlights April 2021
- My March Thank You card measurements, instructions and product list are below the following International Blog Highlights information.
- I’m excited to participate again in Kylie’s International Blog Highlights with my April Thank You card that will be featured in my Whale of a Time class this month.
- I hope you’ll take time to vote for up to five of your favorite cards from the highlights. (Hopefully including mine!)

- Just click: VOTE FOR MY CARD! then select my card (probably #41) by clicking the heart on the upper right of the photo.
- You’ll know you’ve voted for it when the heart turns red.
- The top ten winners based on your votes will be able to participate in the actual International Blog Hop at the end of April.
- One of my goals this year is to make it into the top ten at least once!
If you are receiving this blog update by email you can click HERE to see the amazing gallery.
The Whale of a Time Suite in Stampin’ Up’s 20/21 Annual Catalog grabbed my attention immediately so I bought several packages of the DSP. But evidently I chased rabbits before I ever decided on cards for a class! This template will work with lots of different combinations you may already have on hand, but if you love the card as is, please shop my online store for the products below before the DSP is gone!
Measurements:
- Flat card base is detailed below in sections, then has a flap added:
- Large Cardbase: Night of Navy cardstock: 5 ½” x 12″ (out of a 12″x12″), scored at 4 1/4″, 7 3/4″ and 11 1/4″, then cut one section cut down 5/8″ per instructions below.
- Large Back Panel Dimensions for reference: (DO NOT CUT…already a section of large base) 4 1/4″ x 5 1/2″
- Large Back Panel Mat: Pretty Peacock cardstock cut to 4″ x 5 1/4″
- Large Back Panel DSP: Scenic DSP cut to 3 3/4″ x 5″
- Middle Panels Dimensions for reference: (DO NOT CUT…already sections of large base) 3 1/2″ x 4 7/8″ (x 2)
- Middle Panels (x 2): Pretty Peacock cardstock cut to 3 1/4″ x 4 5/8″ (x 2)
- Middle Panels (x 2): DSP: Scenic DSP cut to 3″ x 4 3/8″ (x 2)
- Small Front Flap Dimensions: Night of Navy cardstock cut to 2 3/4″ x 4 ¼” for front flap
- Small Front Flap Mats (x 2): Pretty Peacock cardstock cut to 2 1/2″ x 4″ (x 2)
- Small Front Flap DSP (x 2): Scenic DSP cut to 2 1/4″ x 3 3/4″ (x 2)
- Pool Party Ribbon: 12″ strip for bow, 6″ strip for front, 7″ strip for inside
- Basic White cardstock – scraps
- Balmy Blue cardstock – 2 3/4″ square or scrap
Instructions:
- With the 5 1/2″ side at the top of the trimmer, cut a 5/8″ strip down the 12″ side of the card base to the 4 1/4″ score.
- Snip or trim the strip away at the scoreline, leaving the middle panels stepped down from the large panel.
- With Tear & Tape, adhere the Navy front flap base to the 3/4″ extension of the main card base.
- Trim the 3/4″ extension down 5/8″ to meet the top of the added front flap, which will be stepped down from the middle panels.
- Diecut the Stitched Shape circles from Balmy Blue and Basic White cardstock for inside.
- On white circle, stamp Whale of a Time greeting in Pacific Point, fish in Calypso Coral and bubbles in Balmy Blue.
- Stamp fish onto large panel DSP in Coral and add bubbles to middle panel DSP with White Craft ink as desired.
- Diecut Basic White rectangle from Stitched So Sweetly dies.
- On rectangle, stamp Many Mates greeting in Pacific Point and color in with coordinating Markers like Bumblebee, Granny Apple Green and Calypso Coral or use Blends as desired.
- Wrap Pool Party ribbon around DSP and tie bow on front flap but just flat or with knot on the inside.
- Adhere Pretty Peacock mats to corresponding sections.
- Adhere DSP to card base and flap per photo.
- Add diecuts and sequins as desired with Dimensionals and glue dots for a layered look.

Fun Times Ahead!
- Please shop my online store for the products below. (Grab your DSP ASAP before it’s gone, or substitute with DSP and cardstock of your choice when you just use the fold as a template.)
- Check my calendar at CreateWithKelley.com to find out more about upcoming in-person, online and kit classes.
- PDF tutorials are available for my class participants and for those in Kylie and Bruno’s Demonstrator Training group.
- Before you head off to make this card, please vote for me first at this link: VOTE FOR MY CARD!
- Contact me today for your creativity boost!
Product List:
|
|
|||
|
|
|
|
|
|
|
|
|
|
|
|
|
|


Amazing card Kelley! Thanks for being part of my International Blog Highlights this month and all the best with the voting!
Thanks so much, Kylie! I appreciate the opportunity to participate.
So neat! Terrific use of that beautiful paper, thx for sharing your talent Kelley
Thanks so much! I LOVE this DSP and have a TON of it I still somehow need to have classes with this month before it disappears! Yikes!
A lovely fun fold card with that DSP, like the whole look of it.
Thanks so much! Yes…I love that DSP too!
What a super fun card! 🙂
Wow! Such a lovely card!
Good luck with the voting and greetings from Germany, Simone
Thanks so much! I love that DSP!
Awesome card!
Thanks for taking time to comment! I appreciate the compliment!