Paper Pumpkin December 20 Beary Comforting Alternatives
The Paper Pumpkin December 20 Beary Comforting Alternatives featured here were my designs except for the Koala rocker card as noted below. Even though cutesy animals aren’t exactly my preferred style, I enjoyed creating alternatives for the December 2020 Paper Pumpkin kit.
- I currently hold a monthly alternatives class for my Paper Pumpkin subscribers and plan to do more PDF tutorials and videos in the future. I’m a video BEGINNER, but here’s my Facebook video post link: https://business.facebook.com/CreateWithKelley/videos/3389891374470304/
- For my card designs I prefer using ink and paper colors that are repeated in the DSP (Designer Series Paper) or other accents. So just two of the cards featured Calypso Coral and Daffodil Delight and the other four featured the unlikely pairing (that I like!) of Rich Razzleberry and Soft Sea Foam.
- This Paper Pumpkin kit contents can stretch to make 3-4 of each card design here except for the Anniversary card. I fussy-cut around some of the diecut pieces to rid them of excess white border and jazz them up a little.
- For the Beary Comforting gatefold card I cut the striped card front and mounted it to a Soft Sea Foam card base, gatefold style.
- Then I stamped the floral bouquet in Razzleberry, the greeting in Basic Gray, added some Gold Metallic Pearls and trim and popped them onto the bear.
- I mounted the bear to the Razzleberry leafy base from the kit with a Basic Gray mat behind it.
- I used leftover pieces of the diecut sheets and other card bases to trim the inside of the card after adding the greeting onto a white Stitched Rectangle diecut.
- This card showcases my first chance to use the Enjoy the Moment stamp set that we received inside our Stampin’ Up! Onstage goody bag.
- I thought it paired really well with the featured colors from the kit.
- The greeting from that stampset (and a frame) was diecut with the Hippo & Friends dies and stamped in Rich Razzleberry.
- This cardfront is cut down from the leftover base from my bear gatefold card, then mounted to a Rich Razzleberry cardbase.
I cased the idea for this cute Koala Rocker card from Vy Tran and just changed it up a little. (See her video with the card rocking at https://youtu.be/9X0IIzX-v3E.)
- I didn’t trust myself to cut out a 5″ circle evenly from a kit card base so I used a retired Stampin’ Up! Circles die to cut it out.
- Everything is from the kit except the gold foil circle that’s cut out with the Stitched Shape circle.
- For this cupcake card front I used the outside of the card base that was leftover from the Koala rocker card and added it to a Razzleberry card base.
- I used the same retired Circle die to cut an envelope to fit into the negative space left.
- If you use any 5″ die (or use a compass to draw it out first and then cut out) for the Koala base you can make this second card from whatever is leftover.
- I added some retired Razzleberry velvet ribbon and some gold foil diecut with a Stitched Shapes oval to augment the kit elements.
Talk about a change of pace!
- My hubby is getting this card for our anniversary on January 18th! (Don’t tell him!) He’s not big on lots of bling or tons of layers and I wanted it to look somewhat masculine so I kept it simple but striking.
- I concentrated on Basic Gray, Gold and Calypso Coral to repeat the colors in the kit’s diecut hearts.
- I cut down the strip remaining from the kit’s circles diecut sheet and mounted it to a Calypso Coral base for the front of the card.
- Then on the inside I used a blending brush to color in the hearts using the stencil that remained after punching the hearts out of the kit’s diecut sheet.
- I LOVE the new Painted Textures embossing folder and think it completes the artsy look of the card.
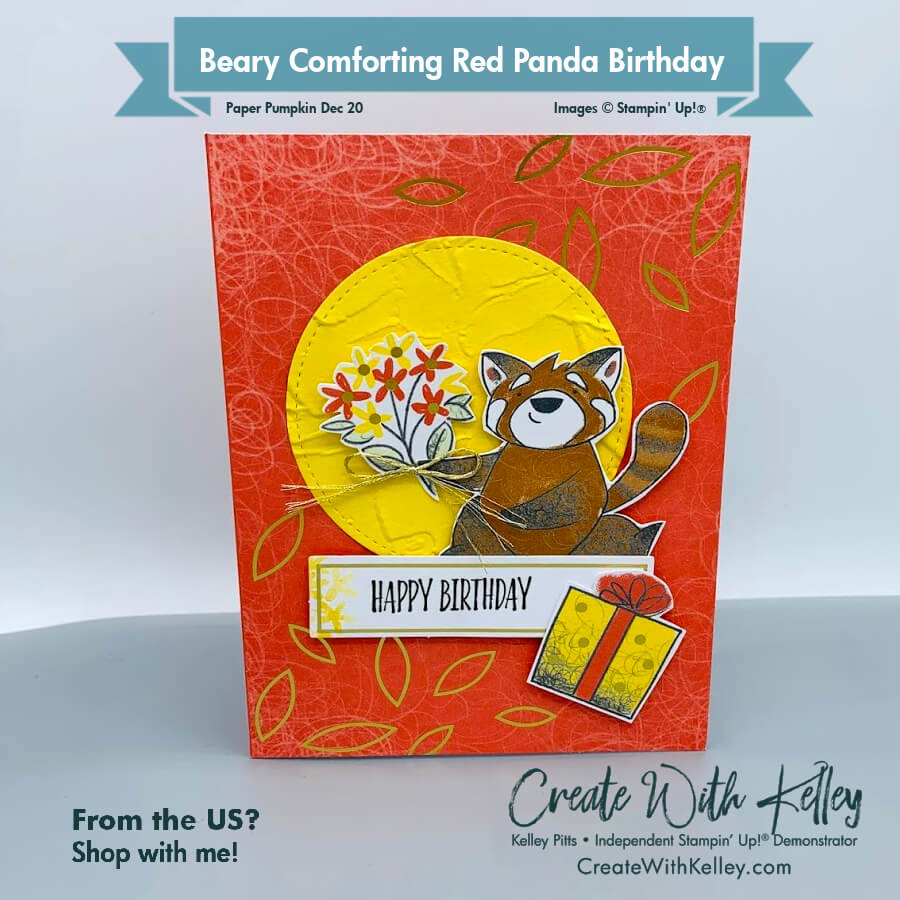
If this bright, cheery card couldn’t make you smile on your birthday you don’t deserve to celebrate! Ha!
- I diecut a Stitched Shape circle out of Daffodil Delight and dry embossed it with the Painted Textures embossing folder. (Have I mentioned I LOVE that folder?)
- The remaining items popped up onto the card base were from the kit except for the greeting and the gold trim.
- Since the gift seemed a bit large compared to the size of the Red Panda, I chose to place it in front of the greeting to give everything more depth.
Thanks for stopping by!


I totally look forward to your alternative designs for the Paper Pumpkin kits every month. Your creativity and sense of color & design are so inspiring!! These cards are really cute. 😊 Thank you Kelley!!