CWK features Stampin’ Up! Fun Fold with Snowflake Magic & Tartan Foil DSPs
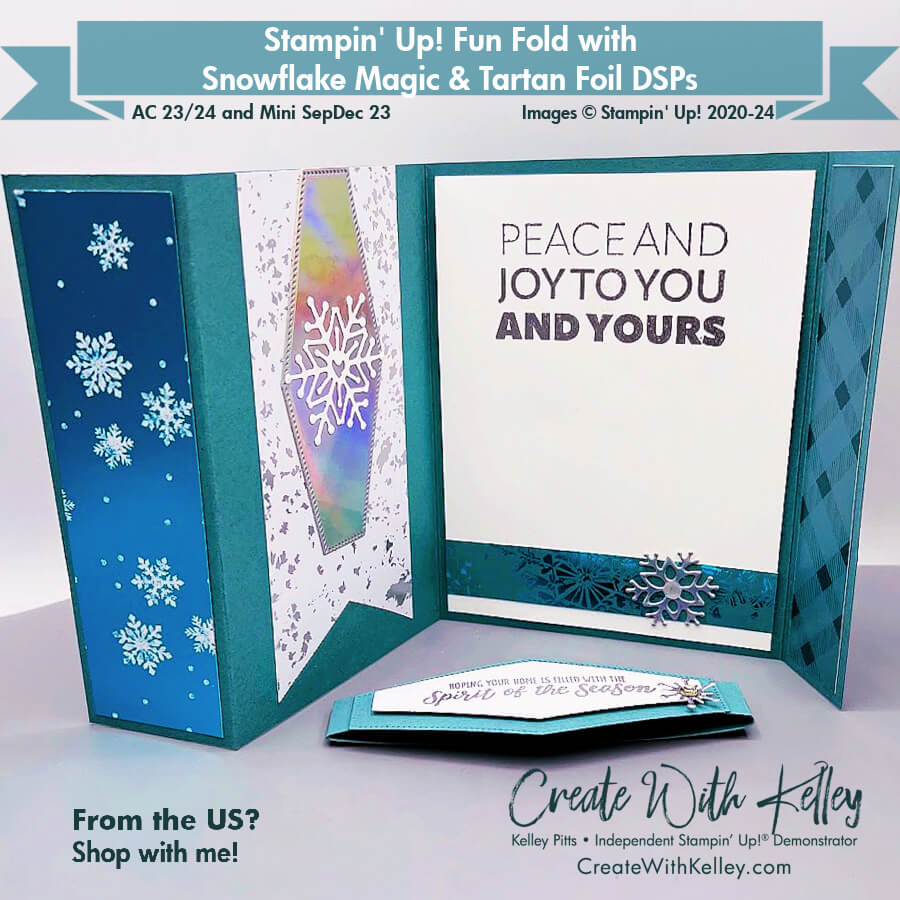
The inside of the card showcases even more of these gorgeous foil papers. Such a peaceful, positive message!
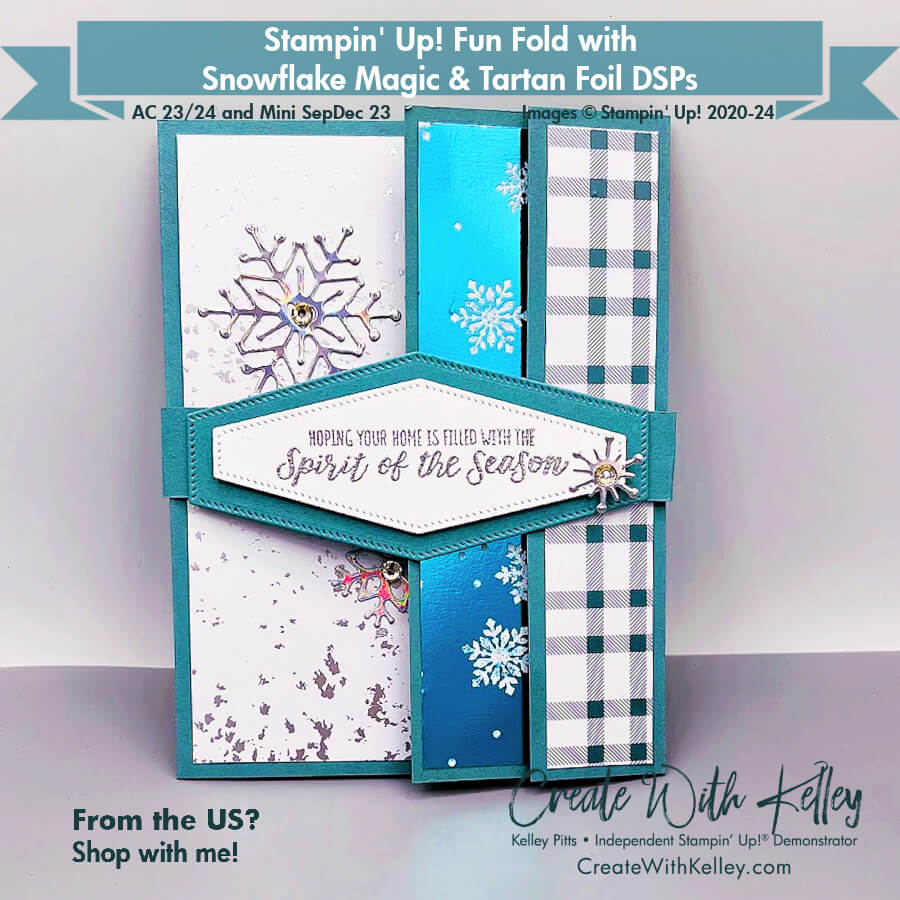
This card showcases the beautiful coordination possible between different paper packs.
This card is one of 16 I featured at my Christmas Cardmaking Retreat on Oct. 27/28.
Measurements:
- Lost Lagoon cardstock base: 5 ½” x 11″, scored at 1 ¼”, 5 ½”, 9 ¼”; and 2” x 4 ¼” for hexagon die; ¾” x 11”, scored at 4” ish for belly band
- Basic White cardstock: 4″ x 5 ¼”, and 1 ¾” x 3 ¾” to diecut with hexagon die; 2” x 2” or scrap to diecut snowflake
- Holographic Trio silver Foil or other Silver Foil”: 2” x 4 ¼” for hexagon die; 4” x 2 ¼” ish or scraps to diecut 1 large, 2 medium and 1 or 2 small snowflakes from Chic dies
- Tartan Foil in Lost Lagoon: 1” x 5 ¼” (x2 pieces)
- Snowflake Magic Foil white sheet: 2 ½” x 5 ¼”, cut into fishtail banner for inside; and 3” x 5 ¼” for front (could be narrower and still work)
- Snowflake Magic Foil dark Lost Lagoon with white snowflakes: 1 ½” x 5 ¼”
- Snowflake Magic Foil with large Lagoon snowflakes: ¾” x 4” for inside
Instructions:
- Cut, score, diecut and stamp as noted in measurements, pictured here and shown on my video linked below.
- Use adhesive sheets on the back of silver foil snowflakes for best results. (Otherwise liquid glue can mar the foil surface.)
- Use Stampin’ Seal (NOT liquid glue) or Tear and Tape with all of the foil papers so your glue lines won’t show through.
- Be sure to flip the 2 pieces of Tartan to expose a different side on each one. (As shown.)
- Emboss the greetings with Versamark and Silver Embossing Powder. (Use plenty of pressure with the Versamark ink to make sure you get a good solid image.)
- With card closed per photo, fold the belly band at the scoreline, then wrap the short end around the front of the card, then wrap the long end around the back, folding gently to hold the card snugly but not tight. Cut off excess if desired.
- Glue belly band together with seam on the front since it will be covered with the hexagons, making sure the overlapping sides are even.
- Glue Lagoon hexagon to the belly band, then pop up the white embossed hexagon with Dimensionals.
- Adhere snowflakes and add embellishments as desired.
- See my 11/12/23 LIVE videos with details on these links on my YouTube channel: Create With Kelley Pitts and my Facebook page: Create With Kelley.
I plan to post all 16 of these cards to my blog, but if you want a handy PDF with all of them together so it’s easy to print, please consider purchasing my Christmas Cardmaking Retreat PDF. Contact me if you’re interested and we’ll work out payment via Venmo or Zelle or PayPal or something. Thanks.
Product List:
|
|
|
||
|
|
|
|
|
|
|
Typical Additional Basic Product List:
|
|
|
|
|
|
|
|
|
|
|
|
|
|
|
|
|
Please subscribe to my CreateWithKelley.com blog to receive:
- Create With Kelley Crew’s News: Monthly newsletter
- Stampin’ Up! sales, news, updates
- Create With Kelley’s calendar featuring cardmaking experiences/events with signup links
- Create With Kelley Card Kits To Go and/or online classes
- Lots of cardmaking inspiration!
I’d love to hear your helpful comments and I’ll be happy to answer any questions. Thanks! Hope you’ll join me soon for in-person or online cardmaking experiences! FUN times ahead!
Kelley Pitts (Create With Kelley) Contact Information:
- Address: PO Box 64334, Lubbock, TX 79464-4334
- Cell: (806) 790-0061
- Email: kelley@createwithkelley.com
- Mailchimp Email signup . Please choose your email preferences when you signup.
- Website/blog/shopping/calendar: CreateWithKelley.com
- Facebook business PAGE (Create With Kelley) Please like/subscribe/follow and share my videos!
- Facebook GROUP (Create With Kelley Crew) Please join!
- Facebook & You Tube Lives via Streamyard: Saturdays at 10:30 am CST (unless otherwised notified)
- You Tube channel: Create With Kelley Pitts
- Pinterest: Create With Kelley


Leave a Reply