Country Floral Lane Triple Horizontal Flap #6
Note: Just this first introductory paragraph repeats on blog posts for all 6 Country Floral Lane (CFL) cards.
How fun is this Country Floral Lane DSP? If you’re also ready to jump into Spring and Valentine’s cards, the Country Bouquet bundle and the Country Floral Lane Suite will get you in the mood! Just switch the sentiment on my card designs to Get Well Soon, Thinking of You, Congratulations, Happy Birthday, Happy Anniversary or Happy Valentine’s Day…these cards work for almost any occasion!
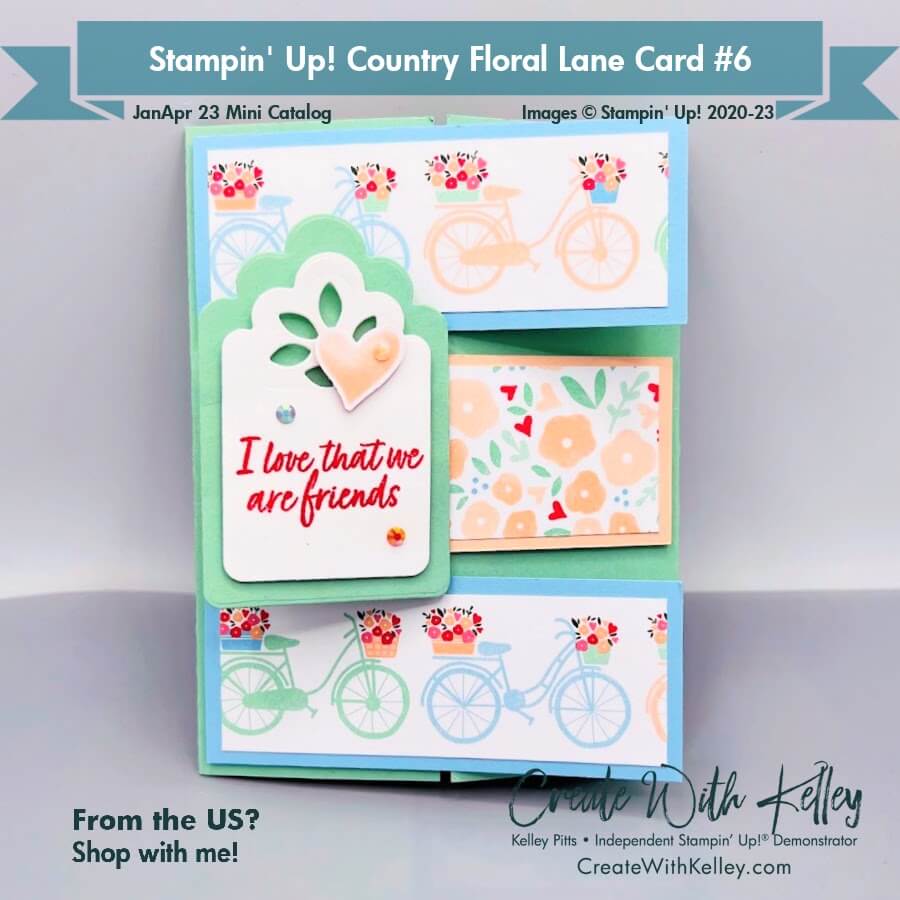
I love how the different elements on the CFL DSP pair together so well! What cute bicycles and flowers together with hearts!
Be careful to make sure there’s a bit of gap between the Something Fancy diecut and the blue flaps so that it opens and closes easily. This photo shows the tulip diecut instead of the leafy one shown in the previous photo.
Alternative front with tulip detail instead of leafy detail.
Measurements:
- Mint Macaron cardstock base: 5 ½”x 8 ½”, scored at 4 ¼”; and 3 ⅜” x 2 ¼” ish scrap to diecut
- Petal Pink cardstock: 1 ½” x 5 ½” (x2); and 1 ⅝” x 4” and small scrap if using tulip die insert instead of just the leafy one
- Balmy Blue cardstock: 1 5/8” x 4” (x2)
- Basic White cardstock: 4 ¼” x 5 ½” to die cut for inside; plus 2” x 3” ish scrap to diecut
- CFL DSP 5 vertical hearts: 1 1/16” ish x 5 ½” (x2)
- CFL DSP heart floral border: ⅞” ish x 2 ½” – 3” (halfway between bicycle bottom and blue heart border row)
- CFL DSP Floral: 1 ⅜” x 2 ½” for this diecut but could need to be up to 3 ¾” (depending on how much room your diecut of choice covers)
- CFL DSP Bicycle: 1 ⅜” x 3 ¾” (x2)
Instructions:
- Be careful to “audition” all your pieces before adhering them.
- Glue the bicycle strips to the blue flaps and the floral strip to the pink flap.
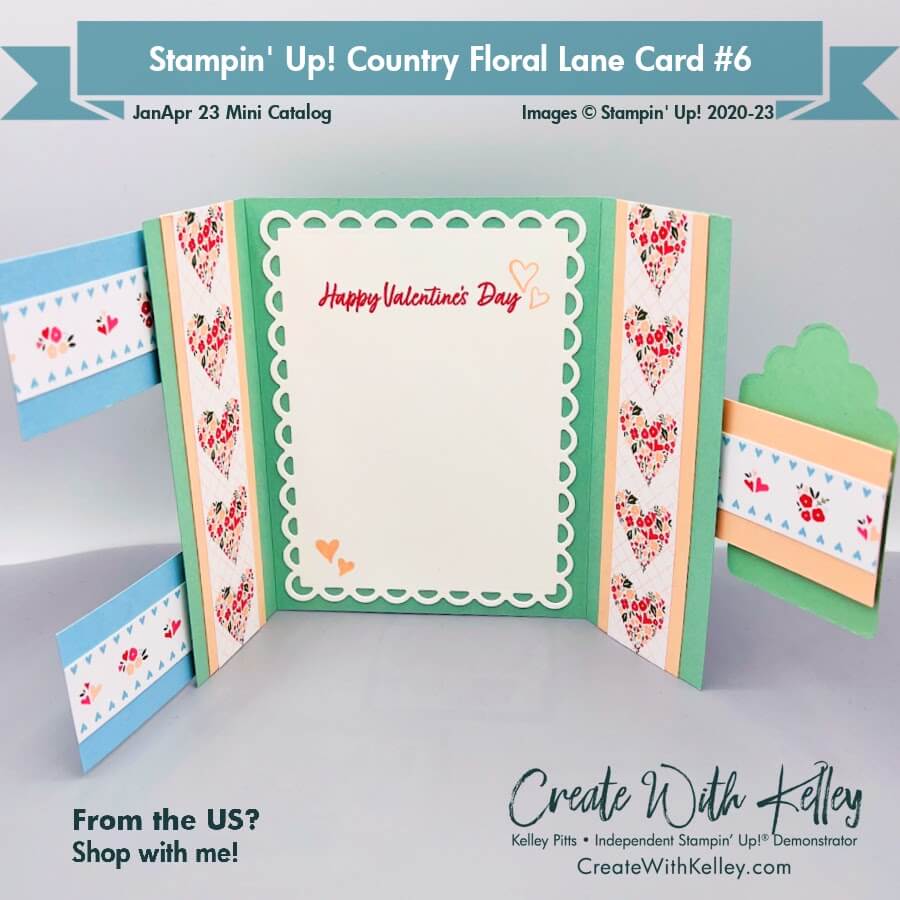
- Ensure the heart border is glued all the way to the left on the back of the Blue bicycle flaps before adding Dimensionals to adhere it to the left front of the card.
- Make sure the heart border is glued all the way to the right side on the back of the Pink floral flap before adding Dimensionals to adhere it to the right front of the card.
- The blue flaps should have an even border on 3 sides, then the pink flap is centered between them.
- Diecut the inside white layer with the Scalloped Rectangle dies or the Stitched Rectangles or Deckle Edge Rectangles…whichever you prefer. I liked how the curves of the scallop mimic the curves of the hearts.
- Stamp greetings in Sweet Sorbet and stamp hearts in Petal Pink, including the heart that is then punched out and layered onto the front diecuts.
- Choose the tulip or leafy diecut insert when diecutting with the Something Fancy dies.
- For more details:
- Find my 1/21/23 Facebook Live video with details on my Facebook page Create With Kelley or my You Tube Live on my Create With Kelley Pitts channel. Please like/share/subscribe to show that you’ll enjoy more free content from me!
- Contact me if you’d like to purchase (for $20) the PDF tutorial for all 6 Country Floral Lane cards I designed. Thanks!
Product List:
|
|
|||
|
|
|
|
|
|
|
|||
|
|
|
|
|
|
|
|
|
|
|
|
When you subscribe to my blog at CreateWithKelley.com and sign up through my Mailchimp form you’ll receive emails about classes, Stampin’ Up! promotions, sales, etc.
I’d love to hear your comments and I’ll be happy to answer any questions. Thanks! Hope you’ll join me for in-person classes, Class-To-Go kits and online classes soon! FUN times ahead!
Kelley Pitts (Create With Kelley) Contact Information:
- Address: PO Box 64334, Lubbock, TX 79464-4334
- Cell: (806) 790-0061
- Email: kelley@createwithkelley.com
- Mailchimp Email signup . Please choose your email preferences when you signup.
- Website/blog/shopping/calendar: CreateWithKelley.com
- Facebook business PAGE (Create With Kelley) Please like/subscribe/follow and share my videos!
- Facebook GROUP (Create With Kelley Crew) Please join!
- Facebook & You Tube Lives via Streamyard: Saturdays at 10:30 am CST (unless otherwised notified)
- You Tube channel: Create With Kelley Pitts
- Pinterest: Create With Kelley


Leave a Reply