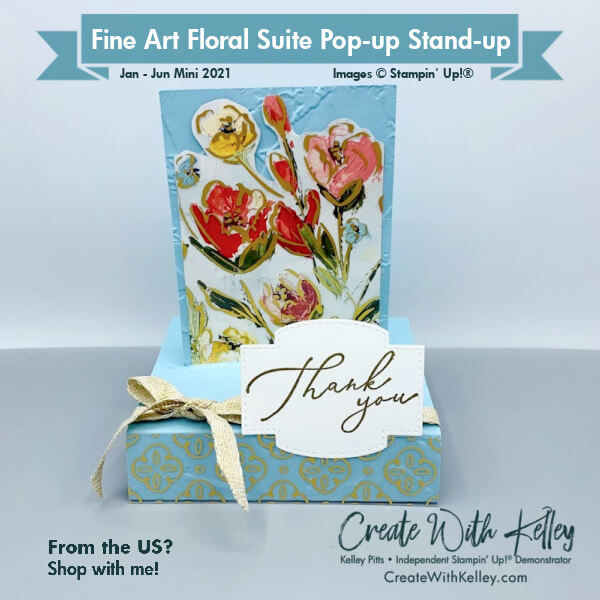
Fine Art Floral Pop-up Stand-up Card for Kylie Bertucci’s February 2021 International Highlights!

I’m thrilled to share my Fine Art Floral Pop-up Stand-up Card for Kylie Bertucci’s February 2021 International Highlights. Doesn’t a beautiful handmade card say Thank You in a way nothing else can?
I found the Pop-up Stand-up fold on a YouTube video by Crafty Caroline: https://youtu.be/cjVr7tyA3NI. But I changed up the way the card folds flat for the envelope, the step for one score and then completely altered the look. My February Thank You card measurements, instructions and product list are below the following International Blog Highlights information.
- I’m excited to participate again in Kylie’s International Blog Highlights with my February Thank You card that will be featured in my Fine Art Floral Suite class this month. I hope you’ll take time to vote for your five favorite cards from the highlights (hopefully including mine!)
- Just click: VOTE FOR MY CARD! then select my card by clicking the heart on the upper right of the photo (should be #43).
- You’ll know you’ve voted for it when the heart turns red. Then you can also vote for up to four others.
- The top ten winners based on your votes will be able to participate in the actual International Blog Hop at the end of February. One of my goals this year is to make it into the top ten at least once!
If you are receiving this blog update by email you can click HERE to see the amazing gallery.
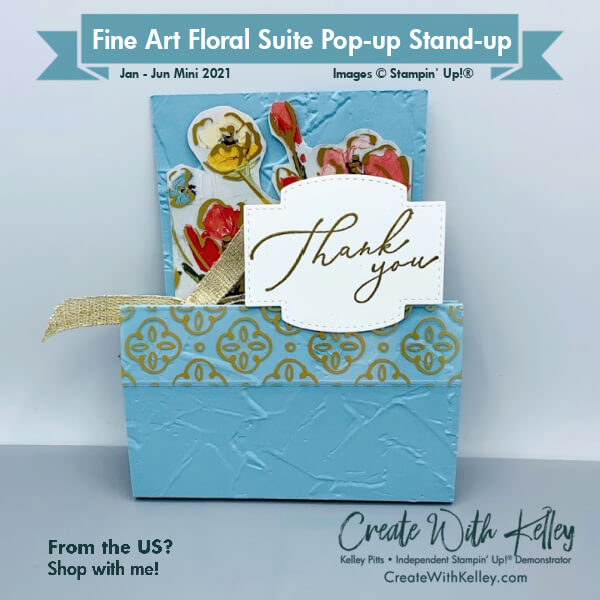
It was a happy accident that when I folded the sides up to fit the card into an envelope it almost looked like the flowers were in a pot! Fun!
Measurements:
- Balmy Blue card stock: 4 1/4″ x 11″, scored across the long end at 1″, 2 3/4″, 3 3/4″, 5 1/2″*(slit, then scored) 7 1/4″, 8 1/4″, 10″
- Balmy Blue card stock 3 1/4″ x 5 1/4″
- Fine Art Floral DSP: 3″ x 5″ (Sadly the bottom 1″ will be covered up.)
- Golden Garden Designer Specialty Acetate: coordinating floral: 3″ x 5″ (Sadly the bottom 1″ will be covered up.)
- Golden Garden Designer Specialty Acetate: quatrefoil: 1″ x 4 1/4″
- Basic White card stock: 2 3/4″ x 2 1/4″ ish scrap, 3 1/2″ x 2 3/4″ back panel
- Fine Art 3/8″ Ribbon: 21″
Instructions:
- Score card base per measurements above except for the 5 1/2″ mark.
- *Cut slit at 5 1/2″ mark, from 1/2″ down to 3 3/4″, leaving 1/2″ on each end which can then be scored.
- Dry emboss both sides of the card base, then the small blue layer with the Painted Texture 3D embossing folder.
- With Tear & Tape or Seal Plus, adhere the bottom of the acetate layer to its coordinating DSP layer, adding glue dots in the center of a few flowers so they aren’t noticeable yet they keep the acetate attached to the DSP.
- Fussy cut around the top of the flowers.
- Adhere the floral layer to the blue layer with liquid glue. (I left the tops of my flowers unglued to give a bit more depth.)
- Diecut small white label from Stitched So Sweetly dies.
- Stamp label with Thank You from SAB Heal Your Heart (or greeting of your choice) in Versamark and emboss with Gold Emboss Powder.
- Fold base along score lines per photo.
- Practice folding the base with the slit on top and the other score lines folded inward to form two rectangular tubes meeting under the slit. The floral layer inserts through the slit and sandwiches between the two tubes. Note: It should fold flat to fit into regular sized envelope. (See “happy accident” photo.)
- Once you understand how everything attaches, you can use Tear & Tape on the top 1″ and the bottom 1″ of the card base, which fold up to meet in the middle, with the insert sandwiched between them.
- Pull backing off one side’s tape and attach the blue insert to it, then make sure the insert is through the slit and attach the other 1″ flap so the insert is securely sandwiched between the two tubes.
- Adhere white panel to the back for your message. (Stamp greeting or flower first if desired.)
- Strategically place glue dots under the small circles in the middle of the quatrefoil acetate strip, then attach strip to front of card base per photo.
- Wrap ribbon through front tube and tie bow per photo.
- Adhere bottom edge of white diecut greeting with liquid glue onto top of acetate layer.
Before you head off to make this card, please vote for me first at this link: VOTE FOR MY CARD!
I hope you’ll also subscribe to my blog at CreateWithKelley.com . I’d love to hear your comments and I’ll be happy to answer any questions. Hope you’ll join me for a Class-To-Go soon! Thanks! FUN times ahead!
Product List:
|
|
|||
|
|
|||
|
|
|
|
|
|
|
|
|


What a charming card Kelley! Thanks for being part of my International Blog Highlights this month and all the best with voting!
Thanks so much! I’ve gotta figure out how to better publicize and ask for votes. I’m slowly learning. Thanks for all your help!
Very pretty!! I love how it stands up to show off the flowers and gold acetate. And folds flat!! So cool!
Thanks! You’ll get to make it in a class soon! (Hopefully this month!)
I love this design. It makes it super easy for the recipient to display it! Great Job. I also voted!!
Amazing card design. So beautiful.